Satiator
The Cycle Satiator® defines a whole new class of ‘smart charger’, one that gives you, as a user, dealer or OEM, full control to set up the optimal charging scenario for your batteries.
Grin Youtube Widget
Amasty Attachments Block
Design Features
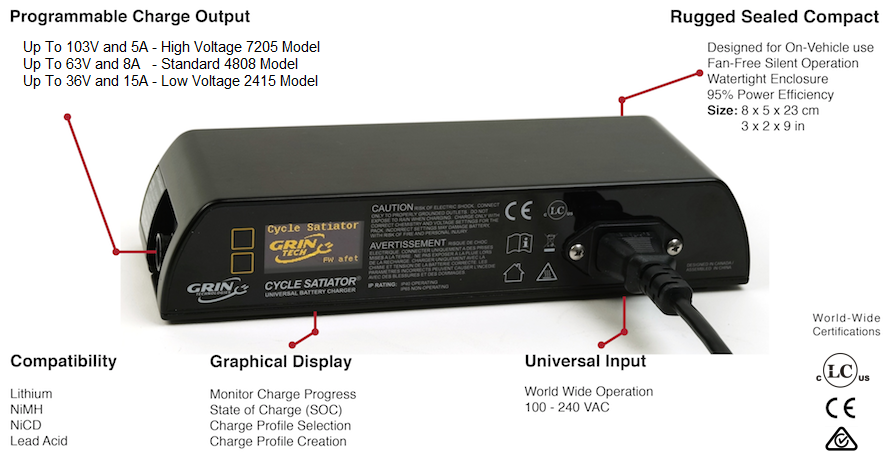
The Cycle Satiator is not limited to charging a specific battery type. Instead this one charger model can be configured for virtually any lithium, nickle metal hydride, or lead acid battery pack. Our standard 48V 8A model will charge packs with up to a 63V max charge voltage (15s for lithium), while the 72V 5A model will work all the way to to 103V max (24s lithium).
 Informative Display
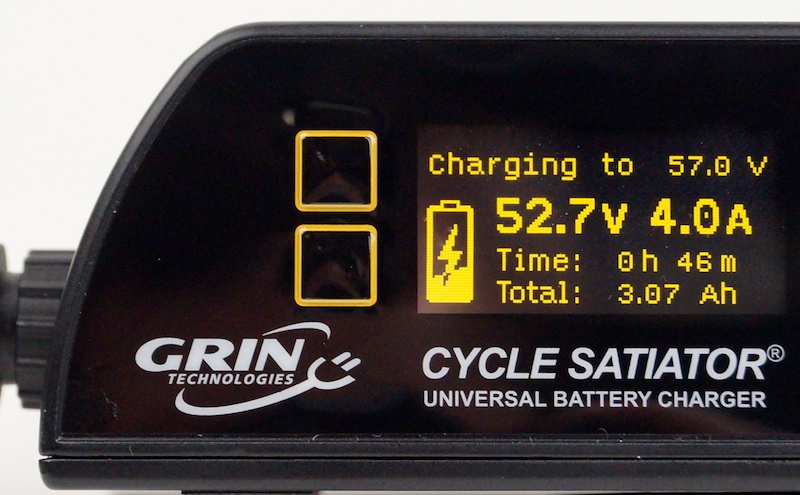
A large and bright OLED display screen shows all your realtime charging statistics; you can see the total amp-hours and voltage along with a clear graphic indicating the approximate charge in the pack.
Compact and Narrow Size
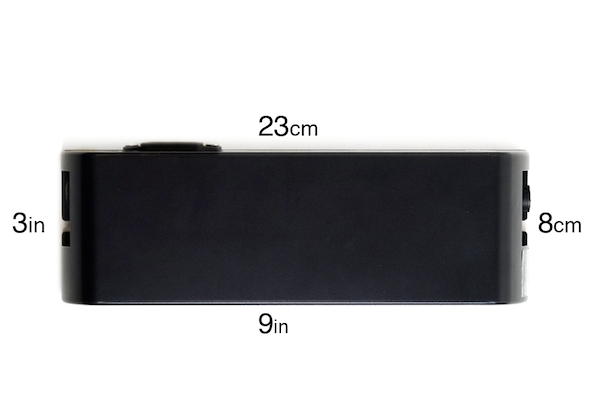
The charger is less than 5cm high and 8cm wide, allowing it to fit easily in a saddle bag, under the rear rack, inside a frame triangle, or screwed to a chassis.
Power Factor Corrected
AC input runs from 100-240v, allowing for worldwide operation without any voltage selection switch, and features a 0.99 power factor which will please your utility grid too.
Benefits
 Onboard Installation
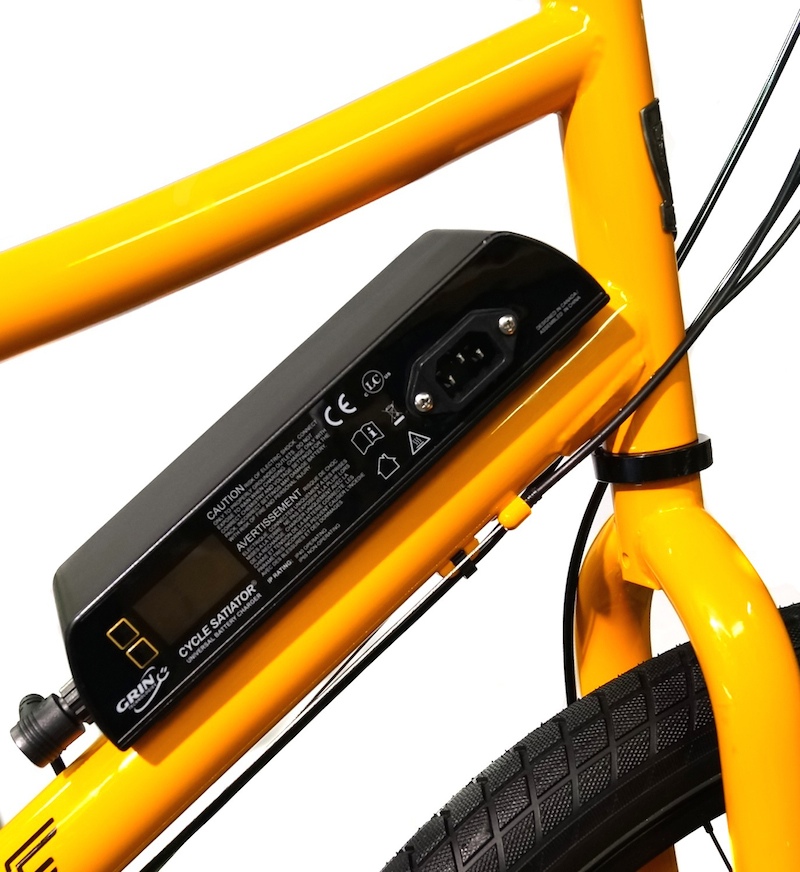
The rugged, compact, and fan-free design allows the charger to be permanently mounted on the vehicle without risk of premature failure from vibration or exposure.
Seriously Fast Charging
With a 360 watt power output, the satiator can charge your batteries in half the time of typical 4amp ‘fast’ chargers. It delivers up to 8 amps with 24 and 36v packs, and 7 amps with 48v packs.
 One Charger For All
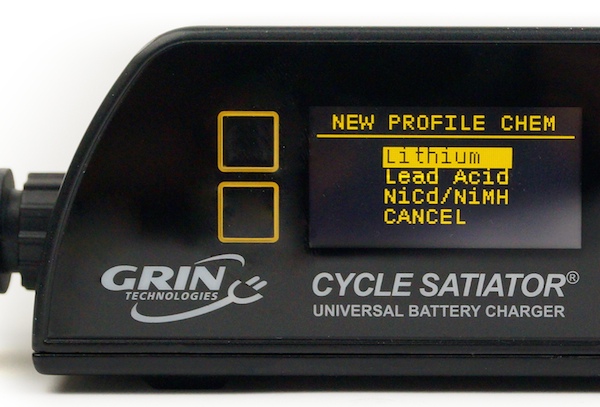
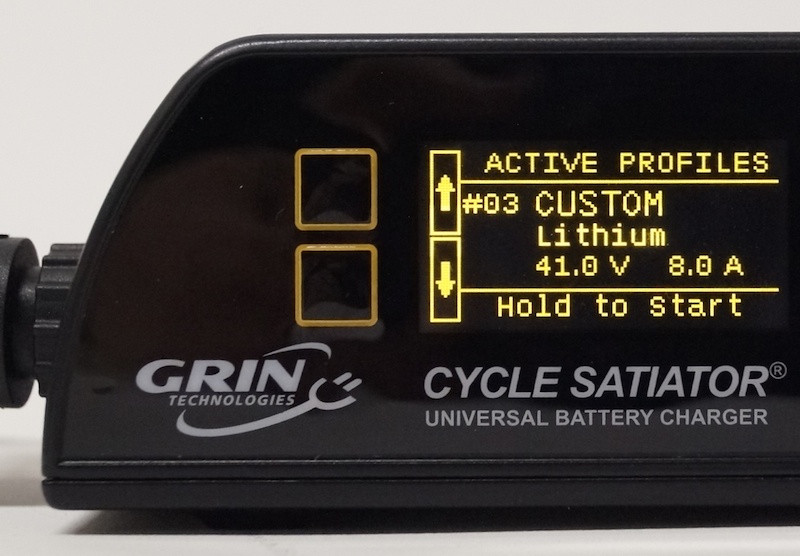
No need for a different charger for each battery type, the satiator can be programmed to work correctly with almost any packs on hand. select from one of our common preloaded profiles or make your own custom charge profiles.
Quick Select
Have anywhere from one to dozens of preconfigured charging profiles active, enabling you to readily switch between output modes with just a quick button press.
Satiate for Enhanced Cycle Life
Most lithium batteries are capable of vastly improved cycle life if they are not fully charged to saturation all the time, but at the expense of reduced range.
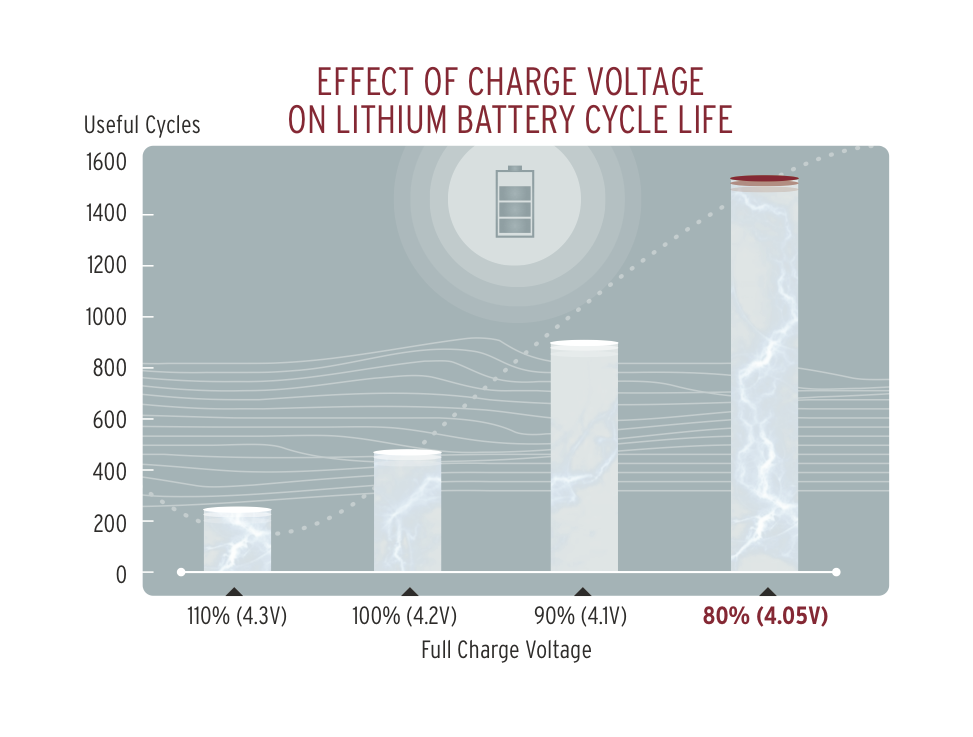
With the cycle satiator, you can program your primary profile to give an 80% charge, and have a secondary profile that does a 100% charge when you need full range. Then have the best of both worlds, a battery that lasts thousands of cycles but still goes the distance when you need it. For more details, read here.
 Designed in Canada
The engineering and design team behind the satiator are avid ebike users with years of experience in electric vehicle technology. This product is the charger they always wished they had, and we hope you feel the same way too.
For OEM and Businesses
In addition to electric bike enthusiasts, this charger is of great value to ebike businesses that need to manage a range of battery packs, and for oems wanting to distinguish their vehicle with a rugged and modern full featured charger.
Certifications
This device is CSA, UL, and CE listed, meaning it has passed rigorous safety and reliability tests, and can be legally resold in most jurisdictions.
Cables and Connectors
The Satiator uses the common IEC connector for the AC input, which is the familiar plug used on computers and many other devices. We have plugs available for the North American, European, UK and Australian/NZ standards, or plug adapters can be used for other countries.

The DC output is connectorized via the waterproof Singatron 2ct3002-w03400 jack. Each Satiator includes a 1m long DC ouput cable that is terminated in a 3-pin male XLR plug. This is a fairly common connector for ebike battery packs, and is used by Allcell and eZee batteries as well as many turn-key electric bikes and scooters. Pin 1 (white wire) is V+, Pin 2 (black wire) is Gnd, and Pin 3 (yellow wire) is for both temperature sensing (with NiCad/NiMH packs) and communications.
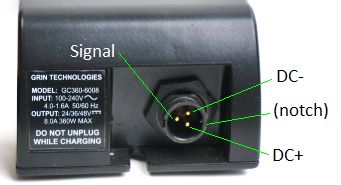 |
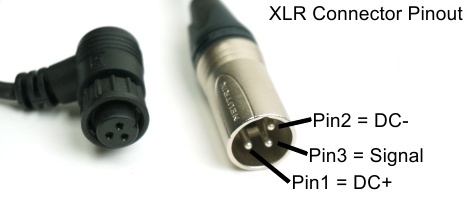 |
There are a host of optional adapter cables from this 3-pin XLR standard to other connector types that can be included with the purchase:
|
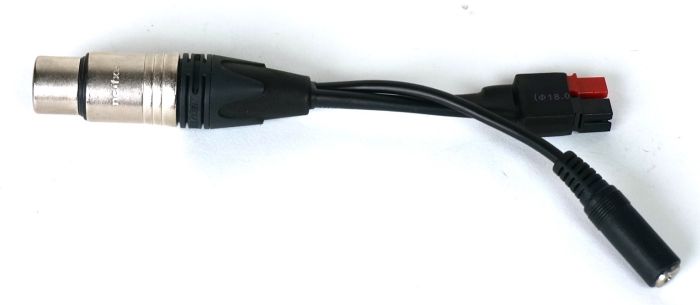
XLR to Anderson |
An XLR to Anderson adapter converts the power leads to a pair of red and black Anderson powerpoles, allowing you to charge a battery via this connector which is commonly used on the pack's discharge wire. | 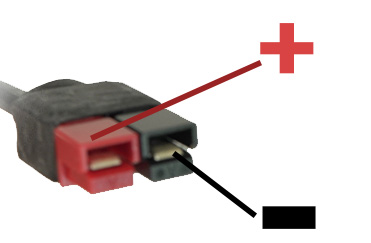 |
|
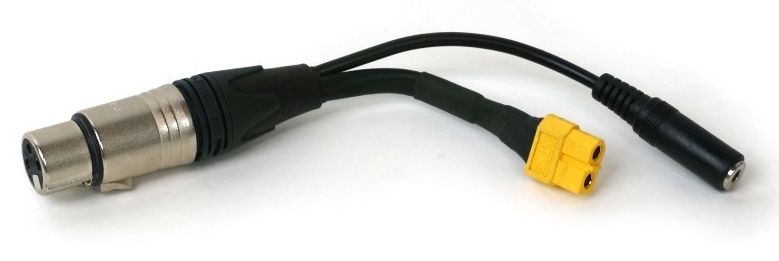
XLR to XT60 |
An XLR to to XT60 adapter, commonly used with RC style battery packs. We have this available both with male and female XT60 plugs as there does not seem to be a consistent gender standard used by battery vendors. | 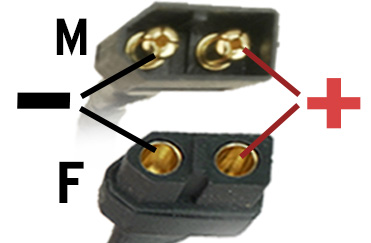 |
|
XLR to DC |
An XLR to DC jack allows the Satiator to charge most frame mounted batteries, like the common "shark" or "dolphin" packs. While the 5.5 x 2.5mm DC plug used on our adapter is rated for 7 amps, most of the DC jacks used on these batteries are of low quality and should generally not be used at more than 4 - 5 amps of current. | 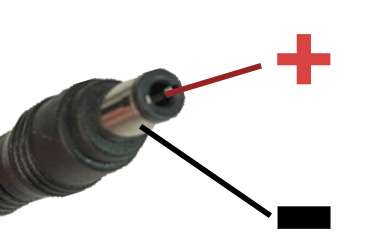 |
|
XLR to Rosenberger |
This XLR to Rosenberger adapter cable uses the straight version of the Rosenberger plug and has one of the signal pins connected to a 5V supply, making it compatible with Specialized ebikes and other factory ebikes using the Brose based drive system. The right angle version of the Rosenberger plug does not fit inside the charge port cavity of the Specialized battery enclosure. | 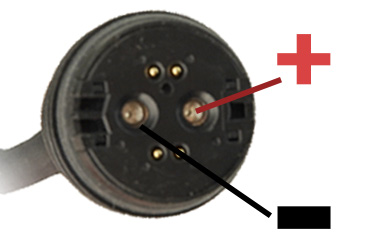 |
|
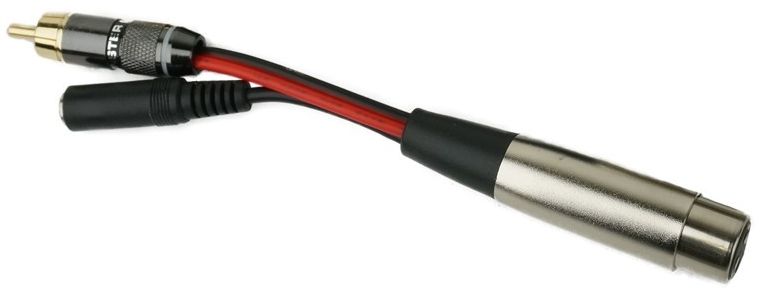
XLR to RCA |
The RCA style plug is commonly used on older generation rear rack mounted batteries such as those sold by Golden Motors. Like the DC jack, it is not a connector style commonly associated with high currents, so care should be excersized when using this at more than 4 - 5 amps. | 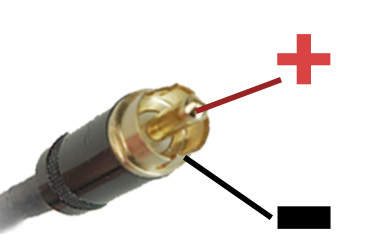 |
|
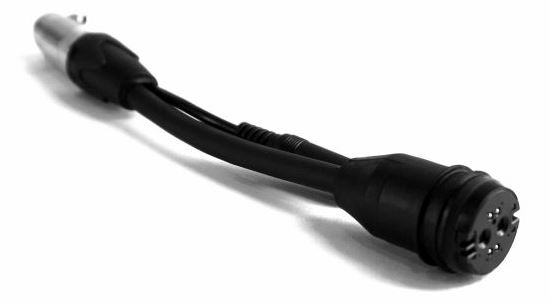
XLR to 4 pin XLR |
The 3 pin to 4 pin XLR adapter cable is specfically made for the Juiced Riders ODK cargo ebikes. These batteries use a 4 pin plug, but simply double up on the pins so that there are two V+ and two Gnd pins. The new 2017 battery series from Juiced are compatible with full 8A charge currents. | 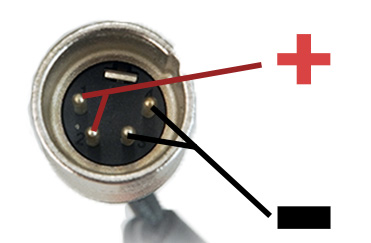 |
|
XLR to ST3 |
An XLR to ST3 adapter allows the Satiator to charge the majority of the batteries currently offered by Grin. The ST3 connector supports higher currents than the commonly used DC jack. | 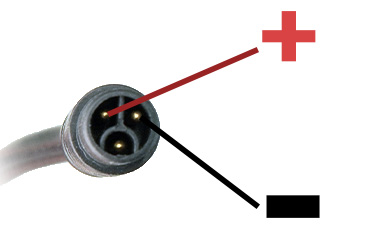 |
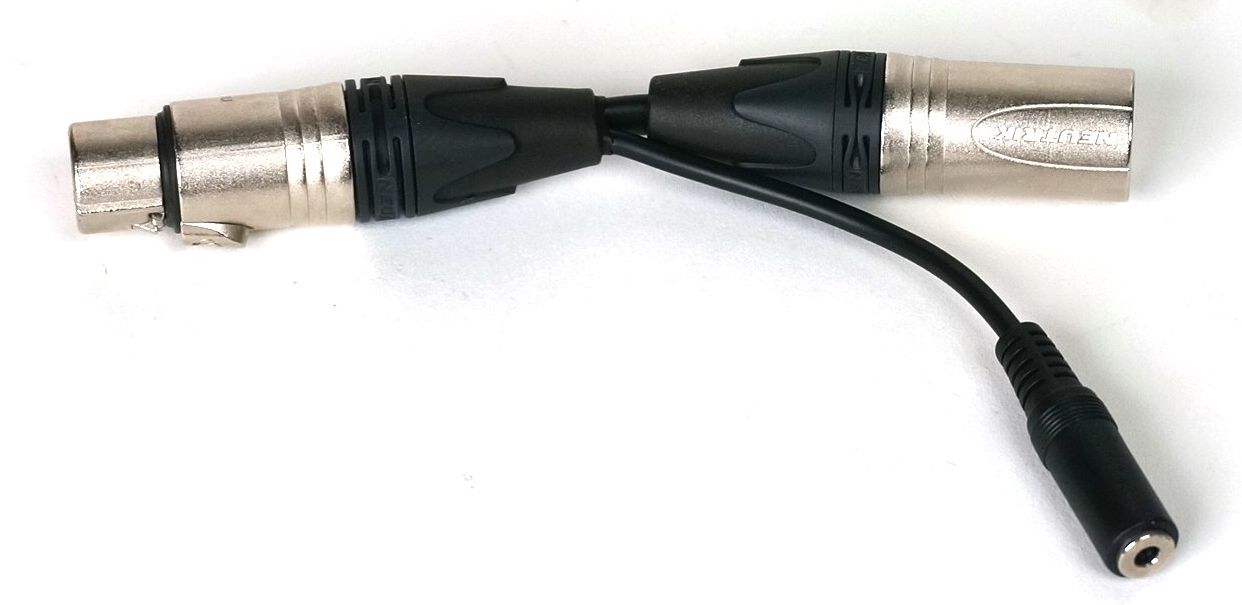
Each of these adapter cables also has a TRS jack on it (commonly used for audio headphones) which allows you to connect the Satiator to a computer using the USB->TTL communications cable.

For those looking to wire their own custom adapter cable with a communication port, both signal lines of the TRS communication plug connect to the signal wire of the Satiator via a 1kOhm resistor, as described in this ES thread post.
Models
At present, we have designed 3 models of the Satiator charger optimized for different voltage ranges all sharing the same great feature set and firmware. The 48V 8A and 72V 5A models are both in full production, while the 24V 15A model is available for samples from interested OEM parties.
| Model Name | 2415 | 4808 | 7205 |
| Max Voltage | 36V | 63V | 103V |
| Max Current | 15A* | 8A* | 5A* |
| Typical Batteries | 12-24V | 24V-52V | 36V-84V |
*Current also clamped by 360 watt power limit
Downloads
| User Manuals | Software |
Drivers |
| Satiator User Manual for V1.0 Firmware | Satiator Suite, Windows | Windows FTDI Driver for USB Cable |
| Satiator User Manual for V0.9X Firmware | Satiator Suite, macOS | macOS 10.3-10.8 FTDI Driver for USB Cable |
| Older Prelim User Manual (for V0.8X Firmware) | Satiator Suite, Linux | macOS 10.9 or later FTDI Driver for USB Cable |
| Satiator Suite for V0.9X Firmware, Windows | ||
|
Satiator Suite for V0.9X Firmware, macOS (open in the application folder) |
||
| Satiator Suite for V0.9X Firmware, Linux |
The Windows version of this application is a self extracting archive that can be extracted and run from whatever folder you choose. The macOS version of this application may require additional security permissions to be run as we are not currently a registered developer with Apple, and may require the unzipped app be copied across from your downloads folder to the Applications folder to run correctly.
In order to update the firmware on a Satiator device, follow these simple steps:
1) Put the satiator device into "connect to PC" mode by pressing both buttons to enter the setup menu, then scrolling down to the line that says "Connect to PC", and select that by holding the bottom lower button.
2) Go to "File --> Update Satiator Firmware..." in menu of the software suite.
3) Click the "Browse" button to see the list of available firmware files on your computer and select the appropriate .Satiator file. To be sure that your list is up to date there is an option to download the most recent firmware from the file menu
4) If you want to reset all your profiles to default during the firmware update, then check the checkbox "Overwrite Profile Data". Otherwise, leave this unchecked and the firmware will udpate but the profile list will stay the same.
5) Press the button "Update Firmware". This will erase, reflash, and verify the firmware on your device, with progress bars moving forward at each step. Avoid unplugging either the communication cables or the AC power cable during the firmware update. If this does happen by mistake, then the device will not work but it can be reflashed again by holding down the lower button when AC power is first applied in order to force bootloader entry (see section 2.3 of user manual).
Note, if you have a very old device with V0.916 or earlier, then it is important to first update your firmware to the recent 1.0XX release before you attempt to read and write profiles. Follow the steps above and be sure to check the "Overwrite Profile Data" box.
If you are using a GX adapter and having trouble charging, please make sure that your Satiator is updated with v1.039 firmware or higher, bundled with the latest software suite linked above.
Specifications
Electrical
| Input Range | 100-240VAC 50-60hz |
| Output Range 4808 | 12-63V, 0-8A, 0-360 W |
| Input Range | 100-240VAC 50-60hz |
| Output Range 4808 | 12-63V, 0-8A, 0-360 W |
| Output Range 7205 | 20-103V, 0-5A, 0-360 W |
| Operating Efficiency | 95% @ 230v, 94% @ 120v |
| Power Factor | > 99% |
| No Load AC Power | < 1 watt |
| Output Leakage | < 100uA |
Mechanical
| Mechanical Dimensions | 237 x 78 x 48 mm |
| Mounting Holes | 5mm flange slots 220mm apart |
| Weight | 1.06 kg (1.33 kg with ac-dc cords) |
| Chassis Material | Diecast Aluminum |
Connectors/Cables
| AC Input Connector | iec320-c14 |
| DC Output Connector | Singatron 2ct3002-w03400 |
| DC Output Cable | 1m with 3-pin neutrik xlr (1=dc+ 2=dc- 3=signal) |
Interface
| Dual tactile push buttons for field setup |
| 128x64 OLED graphical display for charge / profile info |
| LIN bus on signal pin for pc communication and firmware updates (requires custom cable) |
Regulatory Certifications
| Safety | ul 1012, csa c22.2 no. 107.2, ce / iec 60335-1/2-29 |
| Emissions | FCC part 15 b, en55014, en 61000-3-2, en 61000-3-3 |
| Immunity | en 61000-4-2/-3/-4/-5/-6/-11 |

